How to Clean Vintage Costume Jewelry in 7 Easy Steps
To clean your vintage costume jewelry, it’s essential to approach the task with care to preserve its beauty. Start by inspecting the pieces for any damage and identifying the materials used. This knowledge will help you choose the right cleaning method.
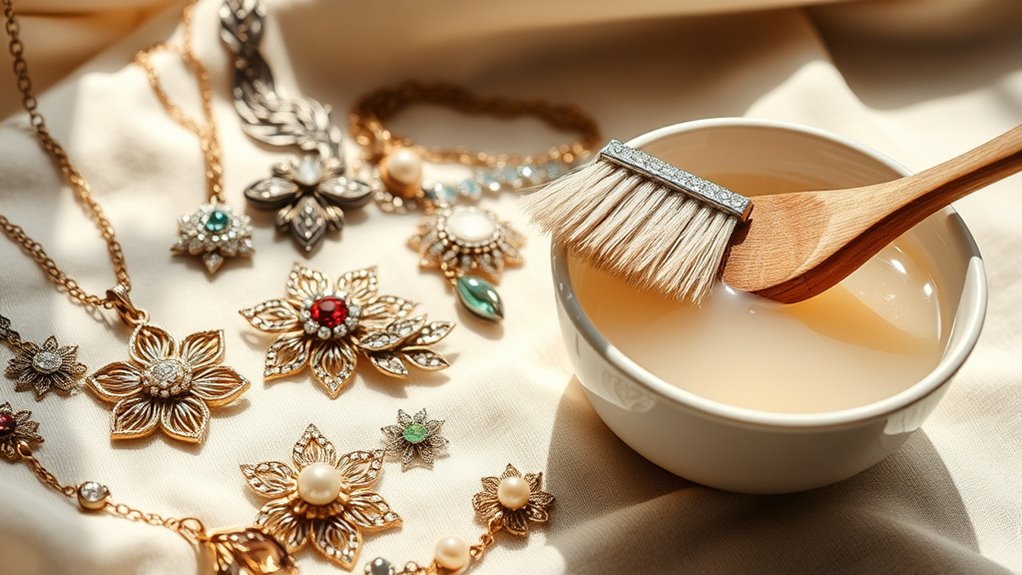
Next, prepare a gentle soap-and-water solution.
Using a soft brush, gently remove any dust and debris from the jewelry.
After that, wipe the pieces with a soft cloth or a damp Q-tip to get into those intricate details.
Rinse carefully with cool water and make sure to dry thoroughly using a soft cloth.
Avoid using heat, as this can damage the jewelry.
Finally, polish the pieces gently and store them in a soft-lined box to prevent tarnish.
With these steps, your vintage costume jewelry will shine beautifully! Keep going to discover how to care for intricate details and delicate finishes.
Inspect and Identify Your Jewelry
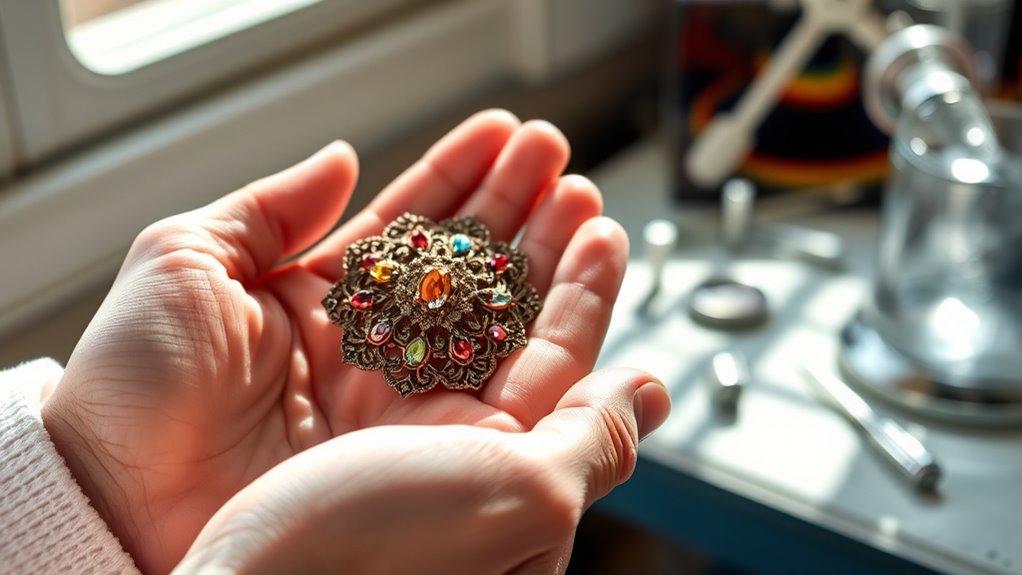
Before you begin cleaning, carefully inspect each piece of vintage costume jewelry to spot any dirt, tarnish, or loose stones.
Take your time to examine the jewelry closely, noting any chipped stones, broken clasps, or areas where glue holds components together.
Identifying these details helps you avoid causing damage during cleaning.
Also, look for markings, brand names, or hallmarks on the jewelry, which can reveal its origin and value.
Knowing the materials—whether metal, enamel, or stones—is vital, as it determines the safest cleaning methods.
By thoroughly inspecting and identifying your jewelry first, you guarantee a tailored cleaning approach that preserves its beauty and prevents harm.
This initial step sets the foundation for effective and safe jewelry cleaning.
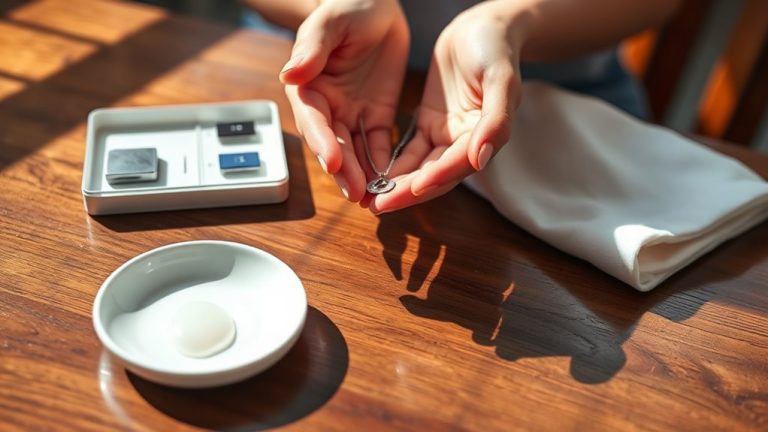
Prepare a Gentle Cleaning Solution
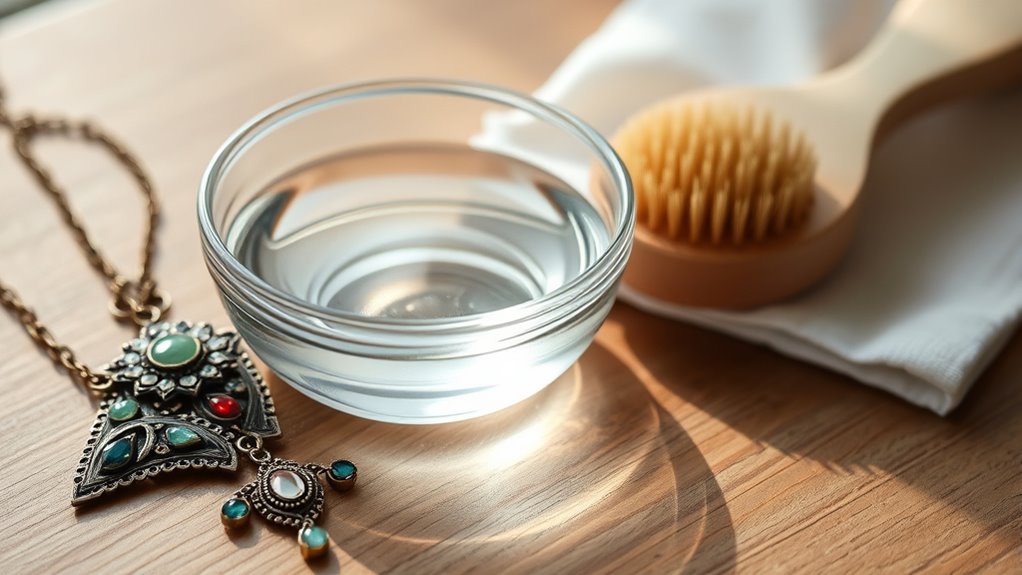
When you prepare a gentle cleaning solution, choose mild soap or a gentle dish detergent diluted in warm water to protect your vintage costume jewelry from damage.
Avoid harsh chemicals like bleach or ammonia, as they can ruin delicate finishes.
For fragile pieces, use just a few drops of gentle soap to minimize liquid exposure.
Before cleaning the entire piece, test the solution on a small, hidden area to guarantee it’s safe.
To apply your cleaning solution, prepare these tools:
- A soft cloth for gentle wiping
- Cotton swabs to reach tight spots
- A soft-bristled toothbrush for detailed areas
Using a soft cloth soaked in your solution helps clean without scratching, keeping your jewelry beautiful and intact.
Remove Dust and Debris With a Soft Brush
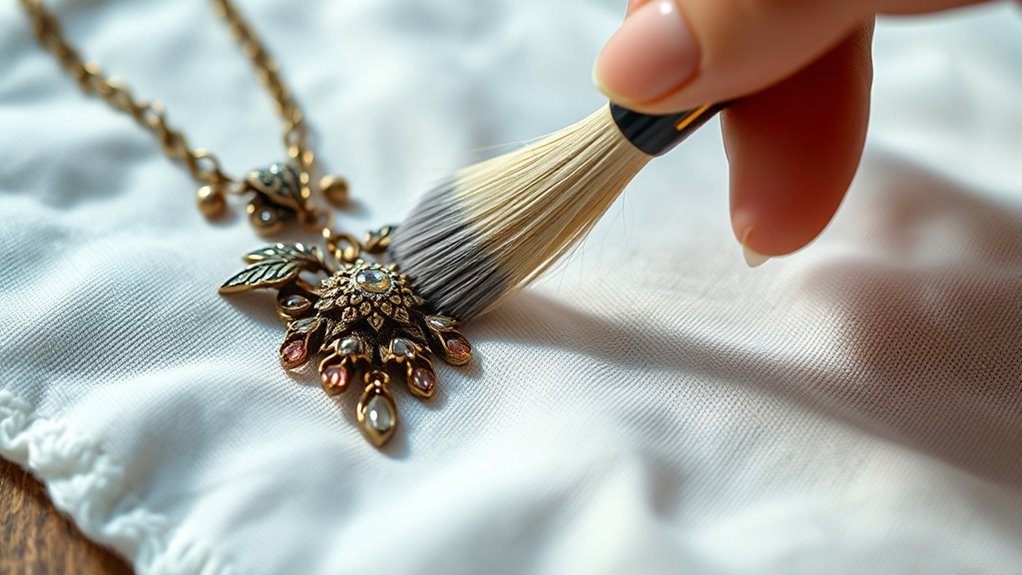
Start by choosing a soft-bristled brush to gently remove dust and debris from your vintage jewelry.
Use a magnifying glass to spot any hidden dirt in small crevices or settings.
Taking your time here prevents damage and prepares your piece for a deeper clean.
Gentle Dust Removal
Although dust and debris can accumulate unnoticed on your vintage costume jewelry, you can easily remove them by using a soft-bristled brush or a clean, unused toothbrush.
Start by lightly tapping or shaking the piece to dislodge loose particles.
Then, gently brush away surface dust with a soft toothbrush, taking care not to press too hard to protect delicate surfaces and stones.
For tight spots, a soft brush or Q-tip works well to reach crevices without damage.
After cleaning, inspect your jewelry with a magnifying glass to ensure all dust is gone.
- Use gentle, sweeping motions to avoid scratches.
- Focus on intricate areas for thorough cleaning.
- Handle each piece with care to preserve its finish and stones.
Soft Brush Selection
To protect your vintage costume jewelry while cleaning, you’ll want to choose a soft-bristled brush that’s gentle enough to avoid scratches and damage.
Opt for a clean soft brush, such as a new toothbrush or a jewelry cleaning brush, with fine bristles designed specifically for delicate surfaces.
This guarantees effective dust removal without harming intricate details or loosening small stones.
Avoid stiff or coarse brushes that could scratch the metal or dislodge embellishments.
When using your soft brush, lightly sweep all crevices, settings, and textured areas to lift dust and debris safely.
Remember to regularly clean or replace your brush to maintain its softness and effectiveness.
This way, you can keep your vintage pieces pristine and well-preserved during every cleaning session.
Inspect With Magnification
When you inspect your vintage costume jewelry with a loupe or magnifying glass, you can spot dust, dirt, and debris that are easy to miss with the naked eye.
Use a soft-bristled brush or toothbrush to gently remove these particles without damaging delicate stones or settings.
Focus especially on crevices and intricate details where dust tends to accumulate. Before moving on to chemical cleaning, ensure all visible dust and debris are cleared.
Remember to:
- Examine every nook and cranny with your magnifying glass for hidden debris.
- Use gentle, careful brushing to avoid dislodging components.
- Remove all loose dust before applying any liquid cleaners.
This careful inspection step guarantees your vintage jewelry stays intact and looks its best after cleaning.
Clean the Jewelry With a Soft Cloth or Q-Tip
Grab a clean, soft microfiber cloth to gently wipe your vintage jewelry without scratching it.
Use a damp Q-tip to carefully reach small crevices and detailed areas like stones and clasps.
Remember to be gentle and avoid soaking the cloth to protect fragile parts.
Selecting Soft Materials
Although vintage costume jewelry demands gentle care, you can effectively clean it using soft materials like a lint-free cloth or a Q-tip.
Choosing the right tools is essential to protect delicate surfaces and intricate designs.
Use a clean, dry, soft, lint-free cloth to wipe away dust and oils without scratching.
For detailed areas, a slightly dampened Q-tip works wonders, reaching small stones and settings without applying too much pressure.
Remember to avoid abrasive materials that could damage your pieces.
Keep these tips in mind when selecting your cleaning materials:
- Opt for a soft, lint-free cloth to prevent scratches.
- Use Q-tips dampened with gentle cleaning solutions for tight spots.
- Regularly replace or wash your cloths and Q-tips to avoid residue buildup.
This guarantees a safe, effective cleaning process that preserves your jewelry’s beauty.
Gentle Cleaning Techniques
Since vintage costume jewelry is delicate, you’ll want to clean it using gentle techniques that protect its intricate details.
Start by using a soft cloth to wipe away dust and light dirt from the surface.
Make sure the cloth is lint-free and slightly damp—never soaked—to avoid moisture damage.
For areas where the soft cloth can’t reach, carefully use a damp Q-tip to remove grime without applying too much pressure.
This gentle cleaning helps preserve the finish and prevents scratches or tarnish.
Avoid abrasive materials or harsh cleaners, as they can harm delicate stones or metal plating.
Reaching Small Crevices
When you clean vintage costume jewelry, you’ll want to pay special attention to small crevices where dust and grime tend to accumulate.
Start by gently wiping the surface with a soft cloth to remove loose dirt.
Then, use a Q-tip dipped in a mild soap solution to carefully reach into those tiny spaces without causing damage.
Remember, don’t press too hard to avoid loosening stones.
For stubborn buildup, lightly swirl the dampened Q-tip in the crevices and follow with a clean, damp Q-tip to rinse.
Finally, dry thoroughly with a soft cloth or a new Q-tip to prevent moisture-related issues.
- Use a soft cloth first to clear surface dust.
- Dip Q-tip in mild soap to clean intricate crevices.
- Dry completely to avoid tarnish or corrosion.
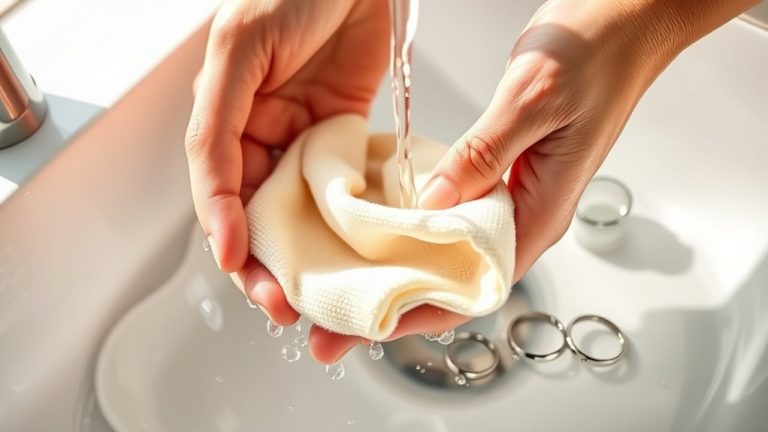
Rinse Thoroughly With Cool Water
To keep your vintage costume jewelry looking its best, you’ll want to rinse it thoroughly with cool, running water after cleaning.
Using cool water helps prevent thermal shock or damage, which hot water might cause to delicate materials like enamel or plastic.
Rinsing vintage jewelry with cool water protects delicate materials like enamel and plastic from heat damage.
Gently hold each piece under a gentle stream to rinse away all soap and cleaning agents, especially from small crevices and settings where residue tends to hide.
This step is vital to clean tarnished areas effectively and avoid buildup that could dull your jewelry over time.
Be careful not to loosen any stones during rinsing by handling your pieces gently.
Thorough rinsing ensures your vintage jewelry stays bright and free from harmful residues after cleaning.
Dry the Jewelry Completely
After rinsing your vintage costume jewelry with cool water, the next step is to dry it completely to prevent any moisture from causing damage.
Start by turning the jewelry upside down and letting it drain for at least 15 minutes—gravity helps remove residual water.
Then, gently dry it using a soft, dry cloth, making sure every surface and crevice is moisture-free.
Avoid heat sources like hairdryers that can warp or damage finishes.
Finally, inspect the piece carefully for any damp spots and dry those areas thoroughly.
- Use gentle patting motions to avoid scratching.
- Focus on intricate details and settings.
- Make certain no moisture remains trapped to prevent tarnish and corrosion.
Taking these steps guarantees your jewelry stays dry and well-preserved.
Polish and Store Properly
Although your vintage costume jewelry may look clean, polishing it with a specialized jewelry cloth will bring back its original shine without damaging delicate surfaces.
Polishing vintage costume jewelry with a specialized cloth restores its original shine without harming delicate surfaces.
Gently buff each piece to remove any remaining tarnish and restore brilliance.
Once polished, store your vintage jewelry carefully to maintain its condition.
Use a soft-lined, anti-tarnish pouch or box to prevent oxidation caused by air exposure.
Keep items separated in individual compartments or wrapped in soft cloth pouches to avoid scratches and tangling.
Avoid sealed plastic bags, as they trap moisture and speed up tarnishing.
Regularly inspect and re-polish your collection to keep it looking its best.
Frequently Asked Questions
How to Gently Clean Vintage Costume Jewelry?
You should gently wipe your vintage costume jewelry with a soft cloth.
Then use a damp toothbrush or cotton swab with mild soap for detailed areas.
Avoid soaking, rinse lightly, and pat dry before storing or wearing.
What Is the Best Homemade Cleaner for Costume Jewelry?
You can’t beat warm water mixed with mild dish soap—it’s like a gentle rain washing away years of grime!
This homemade cleaner safely removes dirt and oils without harming your precious vintage costume jewelry’s delicate charm.
How to Clean Thrift Store Costume Jewelry?
You gently wipe thrift store costume jewelry with a soft cloth dipped in mild soapy water.
For those tricky crevices, use a soft toothbrush to get in there.
If you come across tarnished pieces, soak them briefly in a baking soda solution.
After soaking, be sure to rinse and dry thoroughly to keep everything safe.
How to Make Costume Jewelry Sparkle Again?
Want your costume jewelry to dazzle like new?
Don’t wait—soak it in lemon water, gently polish with toothpaste, then buff with a soft cloth.
You’ll bring back that sparkle faster than you can blink!
Conclusion
Cleaning vintage costume jewelry isn’t just about keeping it shiny—it helps preserve pieces that 70% of collectors say hold sentimental value.
By following these simple steps, you’re protecting your treasures and making them last longer.
Remember, gentle care goes a long way, so take your time and enjoy the process.
With a little effort, your vintage jewelry will stay beautiful and ready to impress for years to come.
In conclusion, maintaining your vintage costume jewelry not only enhances its shine but also safeguards its sentimental worth.
By dedicating a bit of time and using the right techniques, you can ensure each piece remains a cherished part of your collection.
So, embrace the cleaning process and watch as your jewelry continues to dazzle for generations!