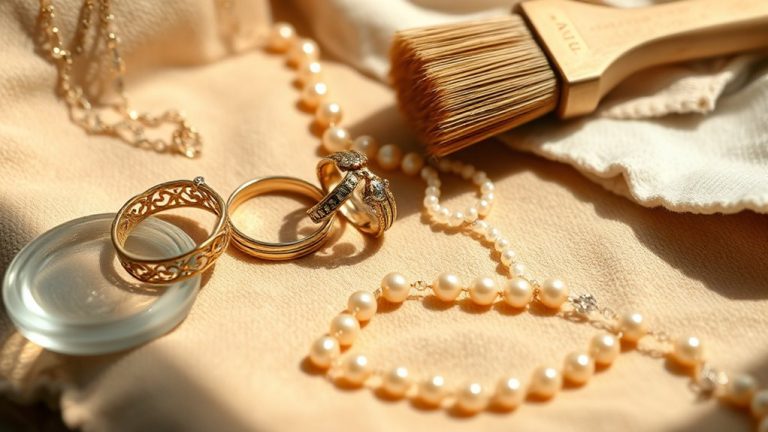
How to Remove Permanent Jewelry Safely
To remove permanent jewelry safely, it’s important to do it right to avoid any accidents. Start by locating the jump ring that connects the ends of the chain.
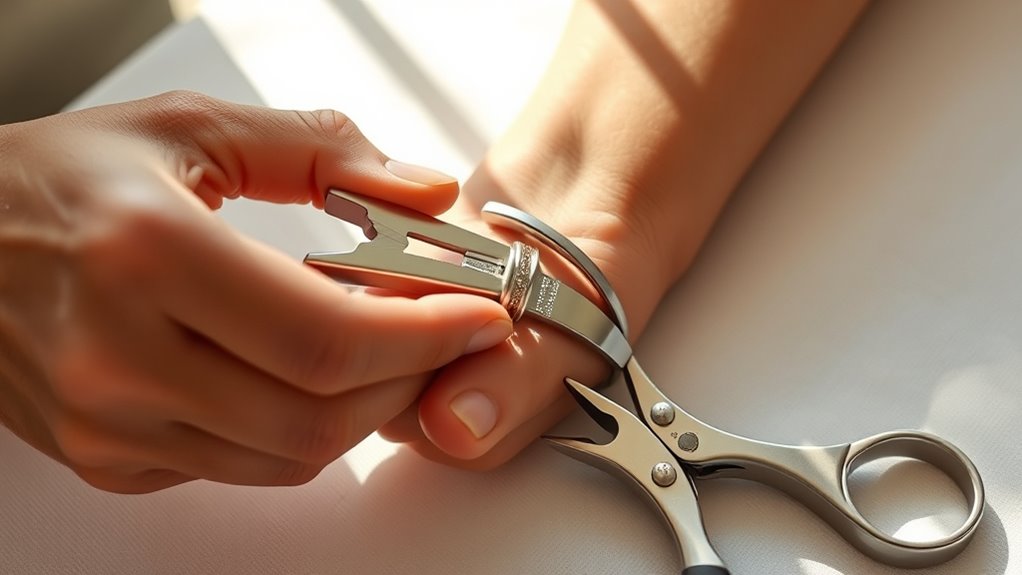
You’ll want to use precise tools like wire cutters or nail clippers. Avoid using knives or sharp blades, as they can cause injury.
Once you’ve found the jump ring, mark its position and apply steady, gentle pressure as you cut cleanly.
Make sure you’re working in a well-lit area, and consider wearing gloves for added protection.
If you’re feeling unsure or if the jewelry is particularly complex, it’s best to seek professional help.
Remember, safety first! Keep following for tips on care, repair, and emergency removal precautions.
Reasons You Might Need to Remove Permanent Jewelry

There are several reasons you might need to remove your permanent jewelry, ranging from medical necessities to personal preferences.
For instance, medical procedures like MRIs, surgeries, or imaging tests often require you to remove jewelry to avoid interference or safety risks.
Workplace safety regulations can also mandate jewelry removal to comply with standards.
If your personal style changes, you might want to take off your permanent jewelry to suit a new look.
Additionally, damage such as bending or warping may force you to remove your piece for repair or replacement.
In emergencies or if you develop allergies, promptly removing jewelry ensures your safety and proper treatment.
Understanding these reasons helps you know when it’s necessary to remove your permanent jewelry safely and effectively.
Tools Recommended for Jewelry Removal

When you decide to remove your permanent jewelry, having the right tools can make the process much smoother and safer.
Small jewelry or wire cutters, like cutting pliers or wire snips, are your best bet for precise removal. These tools help you carefully cut jump rings or chain links without damaging the jewelry or hurting yourself.
Household items such as nail clippers or small scissors can work in a pinch, but they might not offer the same control or safety.
Avoid using knives, saws, or lighters, as they can cause damage or injury.
If you’re unsure, professional jewelers use specialized cutting pliers designed to minimize damage during removal, so consider their expertise when needed.
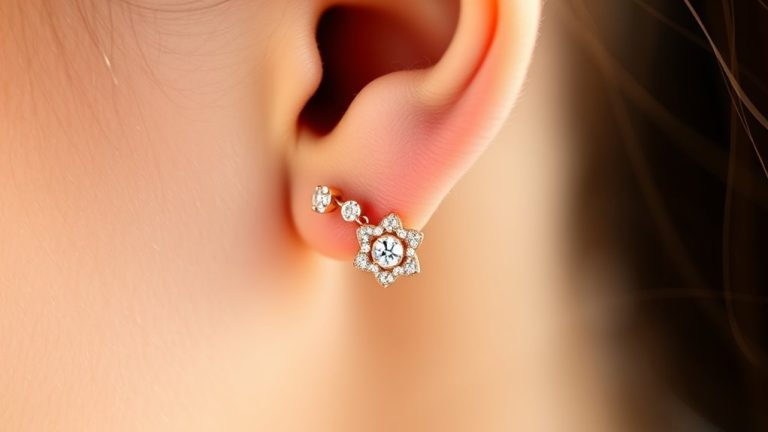
Identifying the Jump Ring for Safe Cutting

To safely remove your permanent jewelry, you first need to locate the jump ring connecting the chain ends.
Feel for a slightly thicker or larger link, which usually stands out from the rest.
Using a magnifying glass or a close-up photo can help you spot and mark the jump ring before cutting.
Locating the Jump Ring
Although permanent jewelry blends seamlessly with your skin, you can locate the jump ring by feeling for a small bump or a slightly thicker circle along the chain.
The jump ring is a tiny circular link that connects the two ends of your permanent jewelry, often a bit larger or more noticeable than the other chain links.
To pinpoint it, gently run your fingers along the bracelet or anklet, noticing any subtle texture changes. If it’s tricky to find, use a magnifying glass or take a close-up photo for better clarity.
Once you spot the jump ring, mark its position with a permanent marker.
This helps verify you cut accurately when you remove the jewelry, avoiding damage to the piece.
Recognizing Jump Ring Features
Since the jump ring serves as the key connection point in your permanent jewelry, recognizing its distinct features is essential for safe cutting.
To identify the jump ring accurately, focus on these characteristics:
- It’s a small, circular metal loop linking the jewelry ends.
- Usually larger or slightly different from other links, making it stand out.
- Look for a subtle seam or opening that indicates where it can be gently pried.
- Use a magnifying glass or take a close-up photo to pinpoint its exact position.
- Mark it with a permanent marker or small sticker for easy recognition during removal.
Step-by-Step Guide to Cutting Permanent Jewelry
When you’re ready to remove permanent jewelry, start by locating the jump ring or connection point.
This usually stands out as a small bump or slight change in the chain’s appearance.
Use small, sharp jewelry scissors, wire cutters, or nail clippers to carefully cut the jump ring or chain at this spot.
Apply gentle, steady pressure to ensure a clean cut without slipping or damaging the jewelry.
If the connection isn’t clear, use a magnifying glass or take a close-up photo to pinpoint the exact place before cutting.
After cutting, gently remove the permanent jewelry and store it safely if you plan to re-weld or reuse it later.
These careful steps make removing permanent jewelry safer and more efficient.
When to Seek Professional Jewelry Removal Services
If you’re dealing with delicate or complex permanent jewelry, it’s best to seek professional removal services to avoid damage or injury.
Certified jewelers use specialized tools like cutters and welding equipment to safely eliminate Permanent Jewelry without harming your skin or the piece.
Consider professional help if:
- The permanent jewelry has hard-to-reach jump rings or chain links.
- You’re unsure how to remove Permanent Jewelry yourself.
- The piece involves sensitive or valuable materials.
- You need removal before medical procedures like MRI or surgery.
- You want to ensure proper reattachment after removal.
How to Protect Your Skin During Removal
Although removing permanent jewelry yourself can be tempting, it’s crucial to safeguard your skin to avoid cuts or irritation during the process.
Always wear gloves and use tools to carefully cut the jump ring, keeping the jewelry away from your skin.
Use a mirror or ask for help to ensure precise cutting without pressing against your skin.
After removal, wash the area gently and apply moisturizer or antiseptic to soothe any irritation.
| Step | How to Protect Your Skin |
|---|---|
| Wear Gloves | Prevents accidental cuts |
| Hold Jewelry Away | Avoids contact with sharp edges |
| Use Mirror/Help | Ensures precise and safe cutting |
| Clean & Moisturize | Reduces irritation and promotes healing |
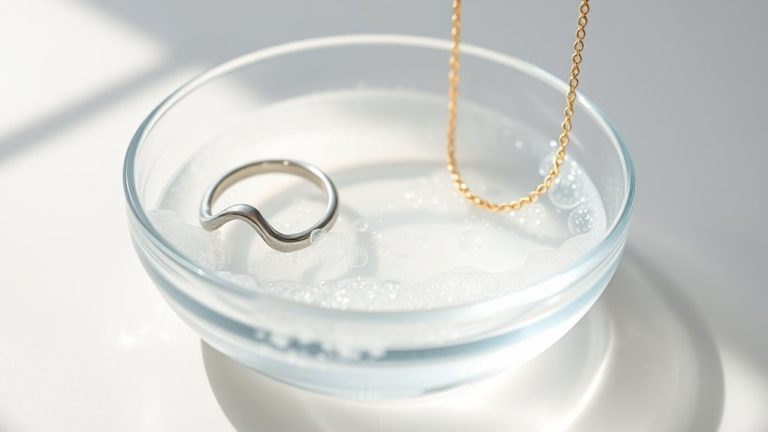
Proper Storage After Removing Permanent Jewelry
Once you’ve carefully removed your permanent jewelry and protected your skin, the next step is to store the pieces properly to keep them in good condition.
Proper storage helps prevent damage and preserves the jewelry’s quality for future use. Here’s how you can do it effectively:
- Use a small, airtight container or soft pouch to avoid scratches and damage.
- Keep jewelry away from moisture, humidity, and harsh chemicals like perfumes or cleaning agents.
Label the container or pouch with the removal date to monitor its condition over time.
Store each piece separately to prevent tangling, especially delicate chains.
Place the storage in a cool, dry place such as a jewelry box or drawer to maintain quality.
Following these steps ensures your jewelry stays safe and ready for any future needs.
Repair and Re-Welding Options Post-Removal
Once your jewelry is removed, you’ll want to have its condition evaluated to see if it’s ready for re-welding.
The process involves carefully heating and fusing the metal links.
Professionals handle this with specialized tools to preserve your piece.
Afterward, proper care ensures your jewelry stays durable and wearable for the future.
Jewelry Condition Assessment
When you remove permanent jewelry, evaluating its condition is essential to determine whether it can be re-welded or needs repairs like cleaning or reshaping.
After removing, the jewelry due for potential re-welding must be carefully inspected for any damage or wear.
Professional jewelers assess factors such as:
- Integrity of the chain links
- Presence of bent or weakened weld points
- Surface scratches or minor damages
- Signs of corrosion or excessive wear
- Proper storage conditions post-removal
If the original chain remains intact and free of corrosion, re-welding is often successful.
Otherwise, polishing, reshaping, or refurbishing may be necessary to restore the jewelry’s appearance and durability for future use.
Proper handling after removing helps preserve its condition for repair.
Re-Welding Process Details
Although re-welding requires specialized equipment and expertise, skilled professionals can restore your permanent jewelry by carefully heating and fusing its metal ends back into a seamless loop.
After you remove all jewelry, the specialist assesses its condition to determine if re-welding is possible.
If the piece isn’t too damaged or worn, they’ll use a jewelry torch to precisely re-weld the ends. This process helps preserve your jewelry’s original design and sentimental value.
Once fused, the jewelry undergoes polishing and cleaning to restore its shine and durability.
Keep in mind, re-welding is a delicate process best left to trained experts.
This ensures your jewelry looks nearly indistinguishable from the original and is safe for continued wear.
Future Wear and Care
If you plan to wear your permanent jewelry again, keeping it in good condition after removal is essential.
When removal becomes necessary, proper care guarantees your piece can be repaired or re-welded for future wear.
Here’s how to maintain your jewelry post-removal:
- Preserve small links or jump rings during removal for easier reattachment.
- Store the jewelry in a soft, secure container to prevent scratches or damage.
- Have a professional assess the piece promptly to check for any damage.
- Address necessary repairs before attempting re-welding to restore strength.
- Avoid bending or twisting the jewelry to maintain its original shape.
Safety Precautions to Avoid Damage or Injury
To prevent injury or damage while removing permanent jewelry, you should always wear protective eyewear and gloves to shield yourself from flying debris and sharp edges.
Follow safety precautions by using specialized jewelry cutters or pliers designed for metalwork to remove jewelry cleanly and safely.
Avoid household tools like knives or lighters because they can slip, causing cuts or damage.
Before cutting, carefully identify and mark the jump ring or connection point to avoid accidentally damaging the rest of the jewelry.
Work in a well-lit, stable environment to maintain control and reduce risks during removal.
Handling Emergency Jewelry Removal Situations
If you face a medical emergency, your safety comes first.
Let professionals handle the jewelry removal. Healthcare providers have the right tools to remove permanent jewelry safely without causing harm or damage.
Only try quick removal yourself if absolutely necessary.
Make sure to use proper jewelry cutters to avoid injury.
Immediate Health Priorities
When you face a medical emergency, removing permanent jewelry quickly and safely becomes essential to prevent injury and avoid interference with treatment.
If you need to remove your permanent jewelry, prioritize these immediate health concerns:
- Inform healthcare providers about your permanent jewelry before any procedure.
- Avoid trying to remove the jewelry yourself in emergencies.
Metal can cause burns during electrocautery or distort imaging like MRIs.
Trained medical personnel should use proper tools to minimize harm.
Quick communication guarantees prompt, safe removal without delaying care.
Professional Emergency Removal
In emergency situations, trained jewelry specialists play a vital role in safely removing permanent jewelry without causing injury or damage.
If you face an urgent need for emergency removal, turn to a Permanent Jewelry Expert who uses specialized tools to carefully extract the piece.
This professional approach minimizes harm to both your skin and the jewelry, preserving it for future re-welding or repair.
Avoid trying to remove permanent jewelry yourself during emergencies, as improper methods can cause cuts or damage.
Studios like Loveweld offer expert emergency removal services, responding quickly and safely.
After removal, make sure to store your jewelry properly and consult the original artist or a professional for guidance on reattachment or future use.
Frequently Asked Questions
How Do You Take Permanent Jewelry Off?
You locate the jump ring, then carefully cut it with small cutters or nail clippers.
If unsure, don’t hesitate to get help from a professional to avoid damage or injury.
Store the jewelry safely afterward.
Can Permanent Jewelry Be Worn in an MRI?
Think of your MRI like a powerful magnet dance floor—if your permanent jewelry’s made of non-magnetic materials, you’re good to groove safely.
Just double-check with your provider to avoid any unexpected twirls or hazards.
Can Permanent Jewelry Ever Come Off?
Yes, you can remove permanent jewelry, but you’ll need professional tools and expertise to cut or separate it securely.
Don’t try it yourself—experts ensure the piece stays intact for re-welding or future use.
Can I Wear Permanent Jewelry in a CT Scan?
You can’t always wear permanent jewelry during a CT scan—it might cloud the image like fog on glass.
Let your radiology team know; they’ll guide you on removal or adjustments to keep your scan crystal clear.
Conclusion
Removing permanent jewelry might feel like defusing a bomb, but with the right tools and careful steps, you’ll slice through it like a pro ninja.
Remember, rushing can turn your precious piece into a tangled mess or worse—injury!
If things get tricky, don’t hesitate to call in the experts.
With a little patience and smart moves, you’ll have your jewelry off safely and ready for a fresh start—no superhero cape required!
In conclusion, removing permanent jewelry doesn’t have to be daunting.
By taking your time and using the right tools, you can ensure a safe removal process.
If you find yourself struggling, reaching out to professionals is always a wise choice.
So, embrace the journey and enjoy your fresh start without the stress of injury or damage!