How Is Damascene Jewelry Made?
You create Damascene jewelry by engraving intricate patterns onto a darkened steel base.
Then, you carefully inlay thin threads of gold or silver into the grooves.
After securing the metals flush with the surface, you oxidize the steel to deepen contrast.
Finally, you meticulously polish the piece to a brilliant shine.
This process blends artistry with precision, resulting in elegant, durable designs.
It’s fascinating how each step contributes to the final piece, don’t you think?
As you dive deeper, you’ll uncover the rich history and detailed techniques behind this unique craft.
There’s so much to learn about the cultural significance and artistry involved!
Origins and Historical Significance of Damascene

Although damascene jewelry traces its roots back over a thousand years to Damascus, Syria, its influence has spread widely, shaping craftsmanship across continents.
Originating in Damascus over a millennium ago, damascene jewelry has inspired artisans worldwide across continents.
This one kind of art blends gold or silver intricately inlaid into darkened steel plates, showcasing the Damascene Technique.
In Japan, Japanese Damascene evolved into a highly skilled, handmade craft, often using gold-plated designs on steel rods.
Europe embraced damascene work in Toledo, Spain, during the 15th century, where artisans crafted exquisite cigarette cases and other luxury items using karat gold and steel.
Damascene remains one of the main symbols of refined craftsmanship, combining steel’s strength with gold’s beauty.
When you handle such pieces, you appreciate the delicate balance of materials and centuries-old tradition behind each creation.
Materials Used in Damascene Jewelry

When you admire damascene jewelry, you’ll notice it usually starts with a steel or iron base that’s intricately inlaid with fine threads of gold, silver, or copper.
These precious metals, often shaped into thin wires, are carefully hammered and pressed into engraved or scored surfaces, creating striking contrasts against the darkened steel.
Artisans choose gold and silver not only for their rich colors but also for their malleability, which allows for detailed decorative designs.
High-quality pieces may feature 24-carat gold inlays embedded into oxidized blackened steel backgrounds, enhancing the jewelry’s elegance.
Modern damascene jewelry combines traditional inlay techniques with overlaying and etching, ensuring each piece showcases the unique blend of metals that defines this exquisite craft.
Preparing the Metal Base

You start by selecting high-quality steel or iron as your base, ensuring it’s clean and polished for a smooth finish.
Next, you transfer intricate designs onto the surface, often using detailed sketches as a guide.
Finally, you prepare the metal through precise engraving and surface treatments to get it ready for inlaying.
Selecting Steel Materials
Since the quality of the steel base determines the final appearance and durability of damascene jewelry, selecting the right material is essential.
You’ll want to choose a high-quality, carbon-rich steel alloy that offers the ideal hardness and grain structure.
This ensures you can incise detailed designs precisely and the base will endure multiple chemical treatments without degrading.
The steel must be smooth and stable to support the intricate engraving and inlay work.
Often, the steel is oxidized or chemically treated to create a dark background that highlights the gold or silver inlays.
Before you begin, make sure the steel is thoroughly cleaned and degreased to promote strong adhesion of the inlaid metals.
Picking the proper steel sets the foundation for beautiful, lasting damascene jewelry.
Surface Preparation Techniques
Although selecting quality steel is essential, properly preparing its surface guarantees your damascene designs stand out with clarity and durability.
You start by thoroughly cleaning the steel to remove dirt, grease, and oxidation.
Next, you carefully score the surface with fine chisels, creating precise lines that guide your inlay or overlay work.
Sometimes, you’ll apply a blueing process—heating the steel until it turns black—to enhance contrast and make your incisions easier to see.
Finally, polishing or burnishing the surface smooths it, ensuring your design materials adhere perfectly.
Key steps include:
- Deep cleaning to guarantee a pristine base
- Precise chiseling for detailed patterns
- Blueing to boost visibility and contrast
- Polishing to create a flawless finish
Each step sets the stage for your stunning damascene art.
Design Transfer Methods
Before inlaying precious metals, artists carefully transfer their intricate designs onto the steel surface.
You’ll start by sketching detailed patterns on paper, then use a fine chisel or scribing tool to trace these onto the metal.
The steel is incised with parallel and crosswise lines, creating a precise outline.
Techniques like scoring or engraving deepen these lines, forming channels for the gold or silver inlay.
Sometimes, you’ll use stencils or templates to ensure accuracy and repeatability.
Once the metal base is prepared with these detailed grooves, it’s ready for embedding precious metal threads.
| Step | Tool/Method | Purpose |
|---|---|---|
| Sketching | Pencil/Paper | Design planning |
| Transferring | Chisel/Scriber | Outline on metal |
| Scoring/Engraving | Engraver/Chisel | Deepening lines for inlay |
| Stenciling | Template | Pattern precision and repeat |
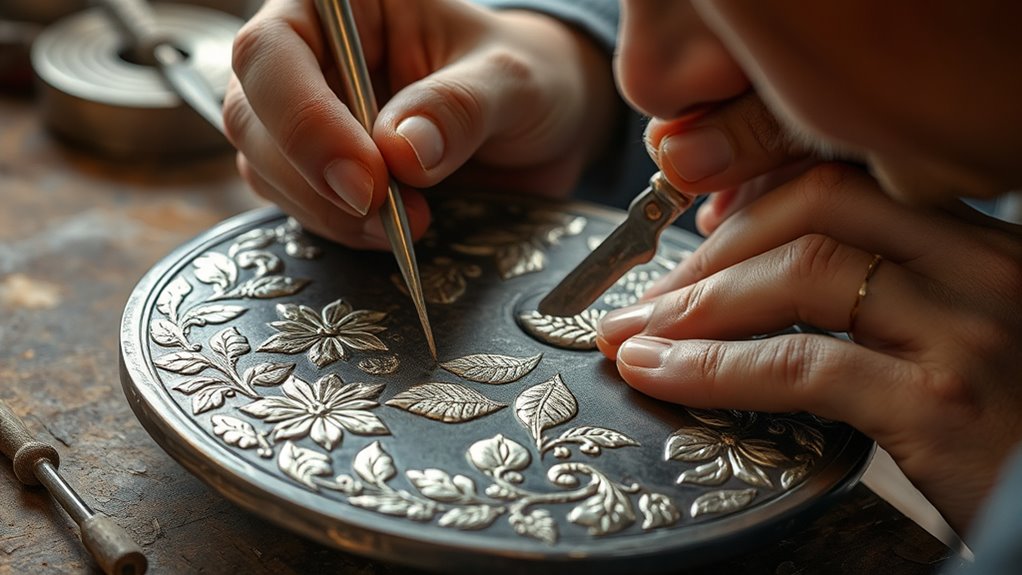
Designing and Incising Patterns
When you’re ready to bring a Damascene piece to life, you start by transferring intricate designs onto the metal surface using fine tissue paper templates.
You carefully sketch and trace these patterns with a sharp chisel or engraver, creating precise outlines.
Then, you undercut the lines crosswise and diagonally, producing a textured, silken surface that adds depth and contrast.
Undercutting lines crosswise and diagonally creates a silken texture that brings depth and striking contrast to the design.
This step demands patience and skill, setting the stage for the jewelry’s signature beauty.
As you work, you’ll experience the thrill of seeing delicate designs emerge.
There’s also the satisfaction of mastering precise, controlled cuts.
Plus, you’ll find joy in creating texture that enhances visual impact.
And let’s not forget the pride in preparing a canvas for precious metals.
This meticulous process defines the elegance of Damascene jewelry.
Inlaying Gold and Silver Threads
You start by tracing intricate designs onto the steel and carving precise channels for the gold and silver threads.
Then, you embed the precious metals by carefully hammering them into the grooves, securing them firmly in place.
Finally, you polish and finish the piece to bring out a smooth, shining surface that highlights every detailed pattern.
Tracing Intricate Designs
Although tracing intricate designs demands steady hands and keen eyes, artisans start by sketching detailed patterns onto the steel surface using fine tissue paper or templates.
Then, they use a small chisel and hammer to carefully incise parallel lines and curves, following the pre-drawn design with precision.
Fine gold or silver wire is hammered into these grooves, embedding the metal securely.
Finally, the surface is leveled and burnished, revealing the stunning contrast and fine detail.
Feel the rhythm of hammer and chisel creating art.
Witness gold and silver threads breathe life into steel.
Appreciate the patience behind every delicate stroke.
Marvel at the transformation from sketch to shimmering design.
Embedding Precious Metal
Once the intricate grooves have been carved into the steel, the delicate task of embedding precious metals begins.
You carefully cut gold or silver threads into thin strips, shaping them to fit perfectly into the engraved lines.
Then, you inlay these strips into the channels, making sure they sit flush and securely.
Using gentle hammering or pressing, you guarantee the metal conforms tightly to the steel, forming a seamless pattern.
This precision prevents shifting or breaking during the process.
| Step | Description |
|---|---|
| Cut Threads | Thin gold/silver strips shaped |
| Fit Strips | Place strips into carved grooves |
| Secure Inlay | Hammer/press metal tightly |
| Check Alignment | Ensure flush embedding |
| Prepare Surface | Ready for burnishing and polishing |
Polishing and Finishing
After embedding the gold or silver threads into the steel, the piece undergoes careful polishing to bring out its shine and smoothness.
You’ll notice the inlaid threads are hammered and burnished until they sit perfectly flush with the steel surface, ensuring durability.
Then, using a smooth tool, the gold or silver is burnished to create a bright, reflective finish that beautifully contrasts with the darkened steel background.
Final touches may include chiseling or relief work to add depth, followed by more polishing rounds.
This meticulous polishing process reveals a stunning contrast between metal and steel.
It creates a smooth, tactile surface you’ll want to touch, enhancing the piece’s durability and longevity.
Plus, it brings out the intricate artistry in every detail.
Chemical Treatments and Oxidation Process
When you heat steel at high temperatures, it burnishes and forms a blackened surface through oxidation. This sets the stage for intricate detailing.
Next, you apply chemical treatments like nitrate acid to etch the steel, corroding specific areas and revealing detailed patterns.
After each treatment, you wash, bake, and polish the steel to sharpen the contrast between the etched design and the darkened background.
Then, you coat the surface with powdered charcoal and oil, baking it multiple times to protect the finish and deepen the blackened tone.
This process enhances the jewelry’s intricate appearance and durability.
To keep the polished look vibrant, you regularly clean the piece using cryptomeria wood and steel rods.
This helps preserve the beauty created by these precise chemical and oxidation techniques.
Final Finishing and Polishing Techniques
Although the inlay work is already intricate, you’ll want to polish the jewelry with fine abrasives to sharpen the contrast between the steel background and the gold or silver details.
This step brings the design to life by enhancing clarity and depth. Then, you’ll burnish the surface with a smooth, hard tool, creating a shiny, reflective finish that catches the eye.
You’ll also carefully remove any excess metal through delicate chiseling and filing to ensure crisp lines.
Finally, a light coating of oil or wax protects the piece and preserves its radiant luster.
- Use cryptomeria wood or steel rods for hand burnishing.
- Achieve a mirror-like, high-gloss finish.
- Ensure clean, sharp design edges.
- Protect the metal with a subtle oil or wax layer.
Identifying Authentic Damascene Pieces
To identify authentic Damascene jewelry, you need to look closely at the craftsmanship and materials.
Genuine pieces feature finely detailed gold or silver inlay set into a darkened steel background, with precise, intricate designs.
Finely detailed gold or silver inlay on darkened steel with precise, intricate designs defines genuine Damascene jewelry.
They’re handmade, often bearing maker’s marks or signatures from places like Toledo or Kyoto, reflecting traditional techniques.
The inlaid metals are smoothly integrated and highly polished, showing expert burnishing.
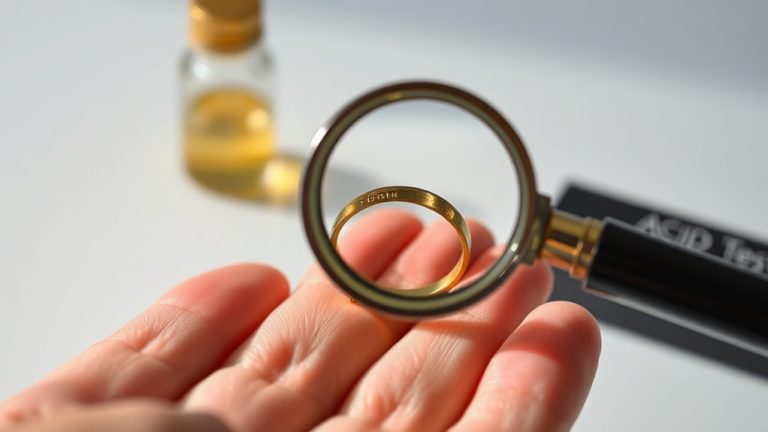
You can test the metals to verify they’re real gold or silver, not plated or simulated.
Magnets won’t attract precious metals, and acid tests can confirm authenticity.
Pay attention to provenance, design detail, and overall quality; these factors distinguish true Damascene jewelry from mass-produced or imitation items.
With careful inspection, you can confidently spot authentic pieces.
Frequently Asked Questions
What Is Damascene Jewelry Made Of?
Damascene jewelry’s made of steel or iron with a darkened surface, into which you inlay fine gold or silver threads.
Sometimes copper or brass appears, but authentic pieces focus on high-karat gold, silver, and quality steel.
It’s really the combination of these materials that gives Damascene jewelry its unique and striking appearance.
You can see the craftsmanship in every piece!
What Is the Process of Damascening?
Picture carving delicate rivers on steel, then weaving gold or silver threads into those grooves.
You’ll hammer, heat, and polish, crafting intricate designs that shimmer with life.
This process demands your patience and steady hands throughout.
What Is the Difference Between Toledoware and Damascene?
You’ll notice Toledoware uses gold overlay with geometric designs, often mass-produced in Spain.
On the other hand, Damascene jewelry, especially Japanese, features hand-engraved steel inlaid with gold or silver.
This type of jewelry showcases detailed scenic motifs that are quite different from the geometric patterns of Toledoware.
How to Polish Damascene Jewelry?
Want to make your damascene jewelry shine like new?
Gently polish with a soft cloth or mild gold-and-silver polish, avoiding abrasives.
Use a soft brush for details, then store it safely to keep its glow alive.
Conclusion
Now that you know how damascene jewelry is crafted, you can truly appreciate the skill behind each piece.
From preparing the metal base to carefully inlaying gold and silver threads, every step requires patience and precision.
When you hold a genuine damascene item, you’re holding history and artistry woven together—proof that sometimes, the devil is in the details.
So next time you see one, you’ll recognize the craftsmanship shining through.
Damascene jewelry is not just an accessory; it’s a testament to intricate artistry and skilled craftsmanship.
Each piece tells a story of dedication and meticulous attention to detail.
Next time you come across this unique jewelry, take a moment to admire the rich history and artistry behind it.
You’ll see that every curve and inlay reflects the passion of the artisans who create these timeless treasures.